Wedding blog to share interesting ideas I have found.

Thursday, July 30, 2009

Room decor

Christine has been asking me to share with everyone M and my room decor for some time, so to stop her bugging, here r some photos. However, being lazier than Christine, we ordered the stickers online and got them delivered right to our doorstep. =D

We arranged for the new bed to arrive on the same day so that we will have minimal movement in the house.


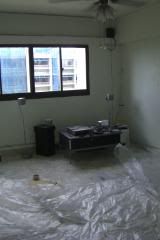
Emptied room, except the old tv console.


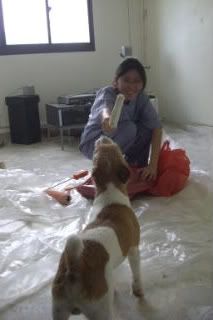
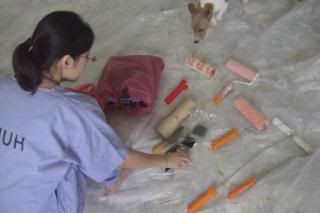
Pepper kaypoh-ing around again~
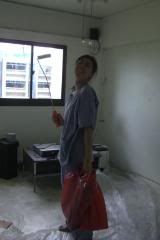
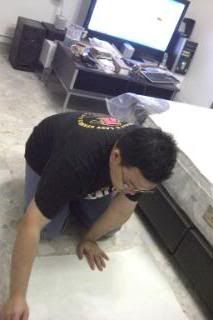

PAINT PAINT PAINT


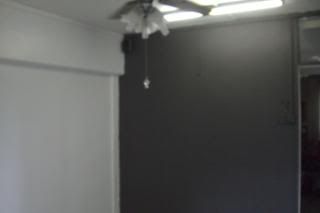
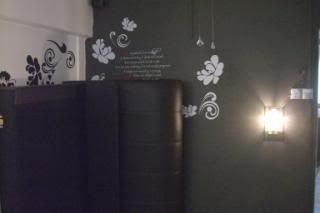
After much hard work, we finally got all 4 walls done. Only 1 is greyish-black. Our favourite one =)

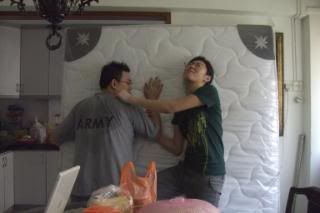
While we waited for the walls to dry, the mattress arrived~

We love our mattress! heh.


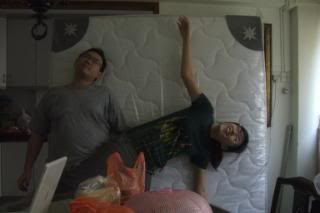
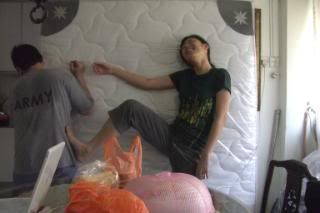
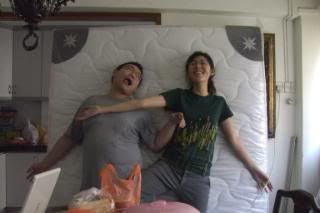
3/4 of the bed is MINE MINE MINE.


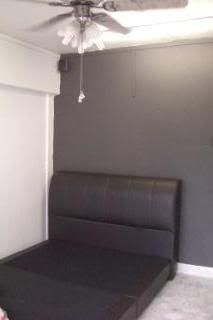
The platform bed came and in it went. Then our stickers arrived!


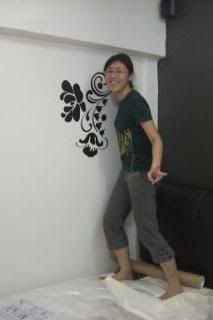
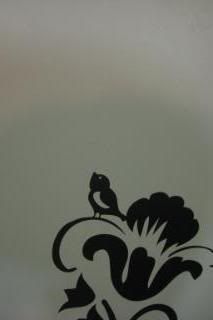
The tester "niaoniao" was forced to reside on the top of the flower, exposed to the harsh sun and rain rather than taking shelter under the flowers.


Dead tired after the whole day.
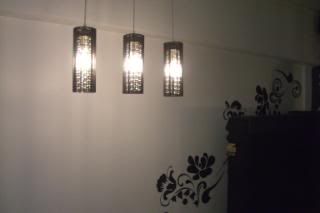
But we forgot to install the lights.


After that, we had our new tv console and wardrobe moved in the next day, had the placement of the ceiling fan relocated to accomodate the wardrobe. All these done up by M's uncle and mummy who knows everything!!!
We're such lucky leeches. HAHA

Saturday, July 25, 2009

Romancing with String Curtains!

It had been a tiring Saturday and Sunday morning!

Woodblock and Princess Christine Went down to the Tanjong Katong mall in search of our dream string curtains and guess what? At a much cheaper price of $58 compared to the plain ones sold at $99 in AMK Central (cost is for curtain width of 1.5m), we got ourselves a very nice string curtains which has silver streaks in between which makes it feel very cool indeed! For those who are interested in the string curtains with beadings, the shop also offers them at the same price. Almost wanted to buy them but i was thinking better dont buy a string curtain which is too black just in case my in laws doesnt like the super black colours. So we ended up buying one with silver streaks which is equally damn chio!!!


Previously we have also bought a black curtain rod rail from IKEA at 30 plus bucks.

So this morning, my father in law who seems to always been our savior in all technical stuff, helped us to do installation of the curtain rod before i cut the string curtains painstakingly into the right length =) and below is our new found mini reno design!

Photobucket
The curtain rod fixtures => nicely done up by my super FIL ( i hope woodblock will finally inherit these genes cos i love such DIYS)

Photobucket
Photobucket
The romantic overview of our string curtains with our new incoming queen seahorse mattress. Notice how much more spacious it is and now with more step details you find that i has created a nice space for woodblock and me to play mini board games and even drink together =) The best place about this new curain fixture is that it has the versatility to put up diff curtains for diff feel
1) String curtains for romantic n modern feel
2) Translucent curtains for dreamy feel *which i am planning to get those reddish maroon ones if i manage to find for my wedding day+ it can used again during new year for some GOOD luck(HUAT AH!)*
3) Opaque curtains so that in future we can have some privacy from our future kids etc lol
4) Bead curtains whenever we feel like a havinga partying mood esp when i invite galfrens over next time for chilling out

so now i have explain why this curtain fixture is so vital in terms of deco and partitioning our small room to fully utilise it's space. The future projects now left will be only address many months later like our LCD tv with full motion wall mount + of cos our wedding photos when they are out! I already know the pic which I am choosing to use as wall display haha so that it will fit out the "fee" of our room

Photobucket
Woodblock and me shifted my ugly workdesk to one space so that it is away from our comfort and R&R (rest and relax) zone. Plus the messy books are hidden behind the cupboard, makes it feel less menancing to guests (actually up till now we have invited any friends over to visit our newly decorated room). In fact the last time when Hong, Qi and M, I swear it was super duper messy like some dog house.

Photobucket
If you have squinted your eyes fine enough you would have notice my new found gem on my work desk! Yes a gift from my 41 bosses. I love it to bits and i thanks the bosses who went out to find this gift. I think they must have telepathy with me because I seen this cup before and to be honest I was wondering if I will be lucky enough to receive it one day. I was really touched by their hard work and surprises for my bdae. I almost tear that morning when the 2 cakes came in one after another => it was never a regret how much i love them like my own family. Thank you so much little bosses!

Photobucket
Welcome to my romantic Room design by Princess Christine and done up with the help and love from my in law family!

Photobucket
Well it's another victory to the little young couple isnt it?

Photobucket
A good place where I can do some reading next time. I am already thrilled by this idea.

Photobucket
Woodblock was beat by the end of the curtain project.

Arigato dear woodblock and sweet dreams in this new romantic zone created by us =)

Monday, July 20, 2009

Fitting at Jenny's

Second fitting didn't start off well.
M was feeling sick, so we had to set off without him. =(
Was kind of disappointed, but i rather him stay at home and rest than drive all the way down.
We arrived early, Christine, my mummy, my sista and me and had some coffee and tea with Jenny (her treat =]) while we waited for the MUA to arrive.


My gown on the mannequin.

Keeping ourselves entertained while Christine caught my Mum snooping through the dresses.


My sis loves the way i look.

My sista the mushroom head.


Bao the wacky post-night-shift woman surviving on Adrenaline from Macdonald's bf.


Jenny decided to add on something else for me.

=)

Next up, my favourite piece.


That's Jenny, checking me out, while I scratch my bum.


I love Jenny, she really knows what I want.

Last piece, which Christine and I are extremely worried about. I am always a bit reluctant to wear short skirts cos I dont have the greatest legs in the world. Christine thinks that it looks really odd and does not go with the top at all.
However, Jenny managed to pull it off again. She actually had additional layer below cos she was concerned that I was uncomfortable in short skirts. We decided to chop off the lowest layer as the length looked rather odd.
The short skirt was meant to be worn under the bustier top, but we decided to wear it over also.
In the end, Christine was most impressed with this piece and gave it the winning "good" thumb.


Forced by Christine to act cute.


More to be done on this, as Jenny is unsatisfied with the waist line of the skirt. She meant it to be hidden below, thus the lack of detailing.
I think its already very pretty though.


Jenny even made a cravat for M. =)
Here's me wishing that the mannequin is M instead. heh.

Thanks for the photos Christine~

Thursday, July 16, 2009

The "H" and the "&" , A DIY logo!

Recently, I visited a wedding blog and what really strikes me was the wedding logo designed and DIY by the bride herself.

Pic Source : http://www.mywedding.com/jaysenclare/custom2.html
On first look what you may just see will be a classic logo but what really made me go pondering for a long time was whether if it was just a mere coincidence or the brilliance and deliberation by the bride to merge the 2 initials in such a way that it resembles the following 2 type of symbols:

1) "H"
2) "&"


I specially love the very fact these 2 letters came merging together so naturally to form the symbol "&" which sort of gives me a warmth feeling about how natural the 2 couples,
Jaysen & Clare came together. Truly impressed by the meaning enhance with the simple logo.

The curiosity really hurts my brain so bad that I couldn't help but popped the question to the DIY bride, Clare , about whether if she had that in mind.
LOL guess what, nah, I made the WRONG guess =( What she had in mind was option 1, the letter "H" . Even though i m clueless to why the letter "H", I cant helped but indulge in my own beautiful perspection(or misconception) of the logo (ie option 2).

Perhaps it is a

Love made in Heaven?

Holy Matrimony?


or just a simple blissful
Happiness? that the couple is feeling about their feeling being together.
Perhaps, one day Clare will be able to clarify all these doubts for us.
Anyway being a DIY KPO, I couldnt helped but probe Clare further on questions which I know many brides will asked about cos i must have many btbs asking me the same questions with regards to my wedding logo.
1) What is the program that you use to create this logo?
Clare: Powerpoint
BTBs: What that simple? (Princess Christine: yes!!! who ever says DIY is about being super duper complex? it is about your CREATIVITY)

2) What is your secret recipe font that you have use?
Clare: Kunstler Script
BTBs: Huh What's that? (Princess Christine: well if you have no idea what font that is like me. just open up ur ppt and look up for that font in there. )

I wan to thank Clare for her sharing and permission to extract the logo from her webby.

Now for an add on secret recipe for DIY logo btbs. Usually I like to visit this particular webby
http://www.dafont.com/
to get fonts that i like. Or you need to do is:
1) Idenfity the font u like
2) Download and save the font file
3) Go to "Control panel"
4) Go to "Fonts"
5) Paste the downloaded font file in

Voila your font is ready for use in your MS office programs such as MS words and ppt =)

Some juicy bites that I am looking forward to:
1) Hong's gown fitting on this Sunday morning
2) An upcomng DIY GDL by another wonderful bride
3) My bdae celeb with woodblock
4) Arrival of my foldable seahorse mattress on next Friday

Monday, July 13, 2009

UPcoming curtain project and DIY Doily Lantern!

Today another BLUE monday. Not so becos of work but rather I am affected by insomnia last night and plus the fact I ate too MUCH DURIAN => I throw up at night and even up to this very moment I still feel kinda nauseous after each meal. It sux big time esp when i am physically down =(

I am so glad so far I have finish selecting all the pics for my Wedding album and I am now excited to collect the design layout when it is gonna be out in a month's time. I will definitely be taking a pic wif it on camera to share it wif my frens here. So do stay tune in a month's time =)
GUess what, I was very excited that woodblock has agreed for a drilling session for me when i casually mentioned and hinted to him how nice it would be to have certain partitioning like string curtain betwen my platform bed area and my workstation and he readily agreed to it and I wonder if he is trying to please me for my upcoming bdae.
So far we gotten a curtain rod from IKEA but we have yet purchase any string curtains for it cost like 90 bucks for just a mere 3m (exorbitant pricing) so i might need to go down to tanjong katong complex for cheaper deals mentioned in reno forums. Plus i need around only 2m in length so hopefully i can find a good lobang soon. But my only concern is that if i get cheap ones, some are not washable and frill easily=(
so i might be saving up for another few months to get a medium pricing one instead =)


DIY string curtains pics from reno forum.

Fortunately that we have unfortunately (lol hope it is not too confusing for u) bought the wrong type of curtain rod for the string curtains => the usual ones is those curtain tracks but we bought those normal curtain roads instead, for it suddenly occur to me that should I felt bored with string curtains (which gives those modern touch feel), I can alternate it with those translucent curtains which is dreamy and romantic!!
Recently I came across the pic of a rect doily used to make into a PAPER lantern! The overall product is a perfect deco for interesting themes like old english cottage feel garden wedding!!!


Do check out their DIY steps in making this gorgeous lantern @ http://zakkalife.blogspot.com/2009/05/how-to-make-paper-lanterns.html